

Belt Calibration
Run the roll test and balance front tension
Run several full rotations
Run several full rotations and look for drift, scraping, or irregular motion.
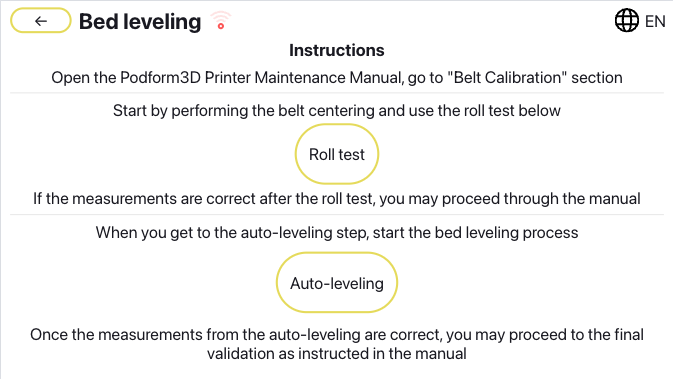
Use this interface for the roll test before moving into the tension adjustments. Tighten both front sides evenly
Aim for balanced front tension, not maximum tightness.
Use the finger test and wrench feel
Use the same feel each time. Do not rely on turn counts alone.
Before you finish
- The roll test has been observed.
- Front tension is balanced.
- No obvious scraping or drift remains before mesh validation.
Run Auto-Leveling and confirm the mesh
Run Auto-Leveling
Use the Bed leveling screen and wait for the full sequence to finish.
Read the mesh as a range
Check the spread between the highest and lowest values.
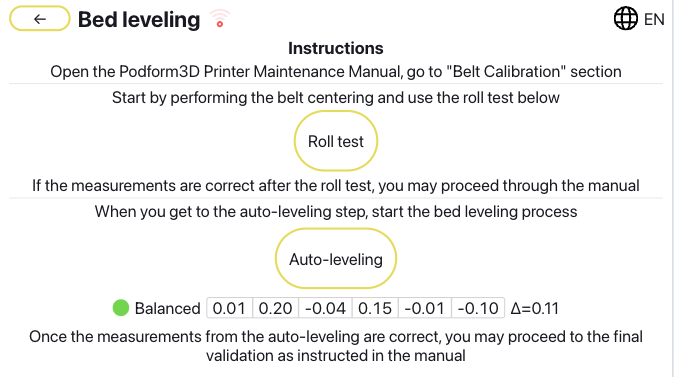
Use the mesh result as the validation step after tensioning. Adjust rear tension only if needed
If the mesh still fails, make a small rear adjustment, then rerun leveling, the Roll test, and the 4-corner measurement.
Before you finish
- Auto-Leveling has been run.
- The mesh range has been checked.
- The final roll test and measurement pass still look stable.