

Mobile Scanning App
Set up the Connect app before scanning
This tutorial keeps the operator on the Connect app screens that matter for a first scan. The goal is to stop download confusion, confirm the user is scanning under the right clinic context, and prevent wrong mirror or scan-method data.
Download and open the mobile scanning app
Download Podform3D from the App Store on an iPhone or iPad with a TrueDepth camera. Supported iPhone models are: iPhone 17e, iPhone 17, iPhone Air, iPhone 17 Pro, iPhone 17 Pro Max; iPhone 16e, iPhone 16, iPhone 16 Plus, iPhone 16 Pro, iPhone 16 Pro Max; iPhone 15, iPhone 15 Plus, iPhone 15 Pro, iPhone 15 Pro Max; iPhone 14, iPhone 14 Plus, iPhone 14 Pro, iPhone 14 Pro Max; iPhone 13 mini, iPhone 13, iPhone 13 Pro, iPhone 13 Pro Max; iPhone 12 mini, iPhone 12, iPhone 12 Pro, iPhone 12 Pro Max; iPhone 11, iPhone 11 Pro, iPhone 11 Pro Max; iPhone X, iPhone XR, iPhone XS, iPhone XS Max. Supported iPad models are: iPad Pro 13-inch (M4 and M5); iPad Pro 11-inch (M4 and M5); iPad Pro 12.9-inch (3rd through 6th generations); iPad Pro 11-inch (1st through 4th generations). After installing the app, log in with the same login as the portal login. On the Profile screen, the top-left icon logs out. Do not tap it unless you need to disconnect or switch accounts.
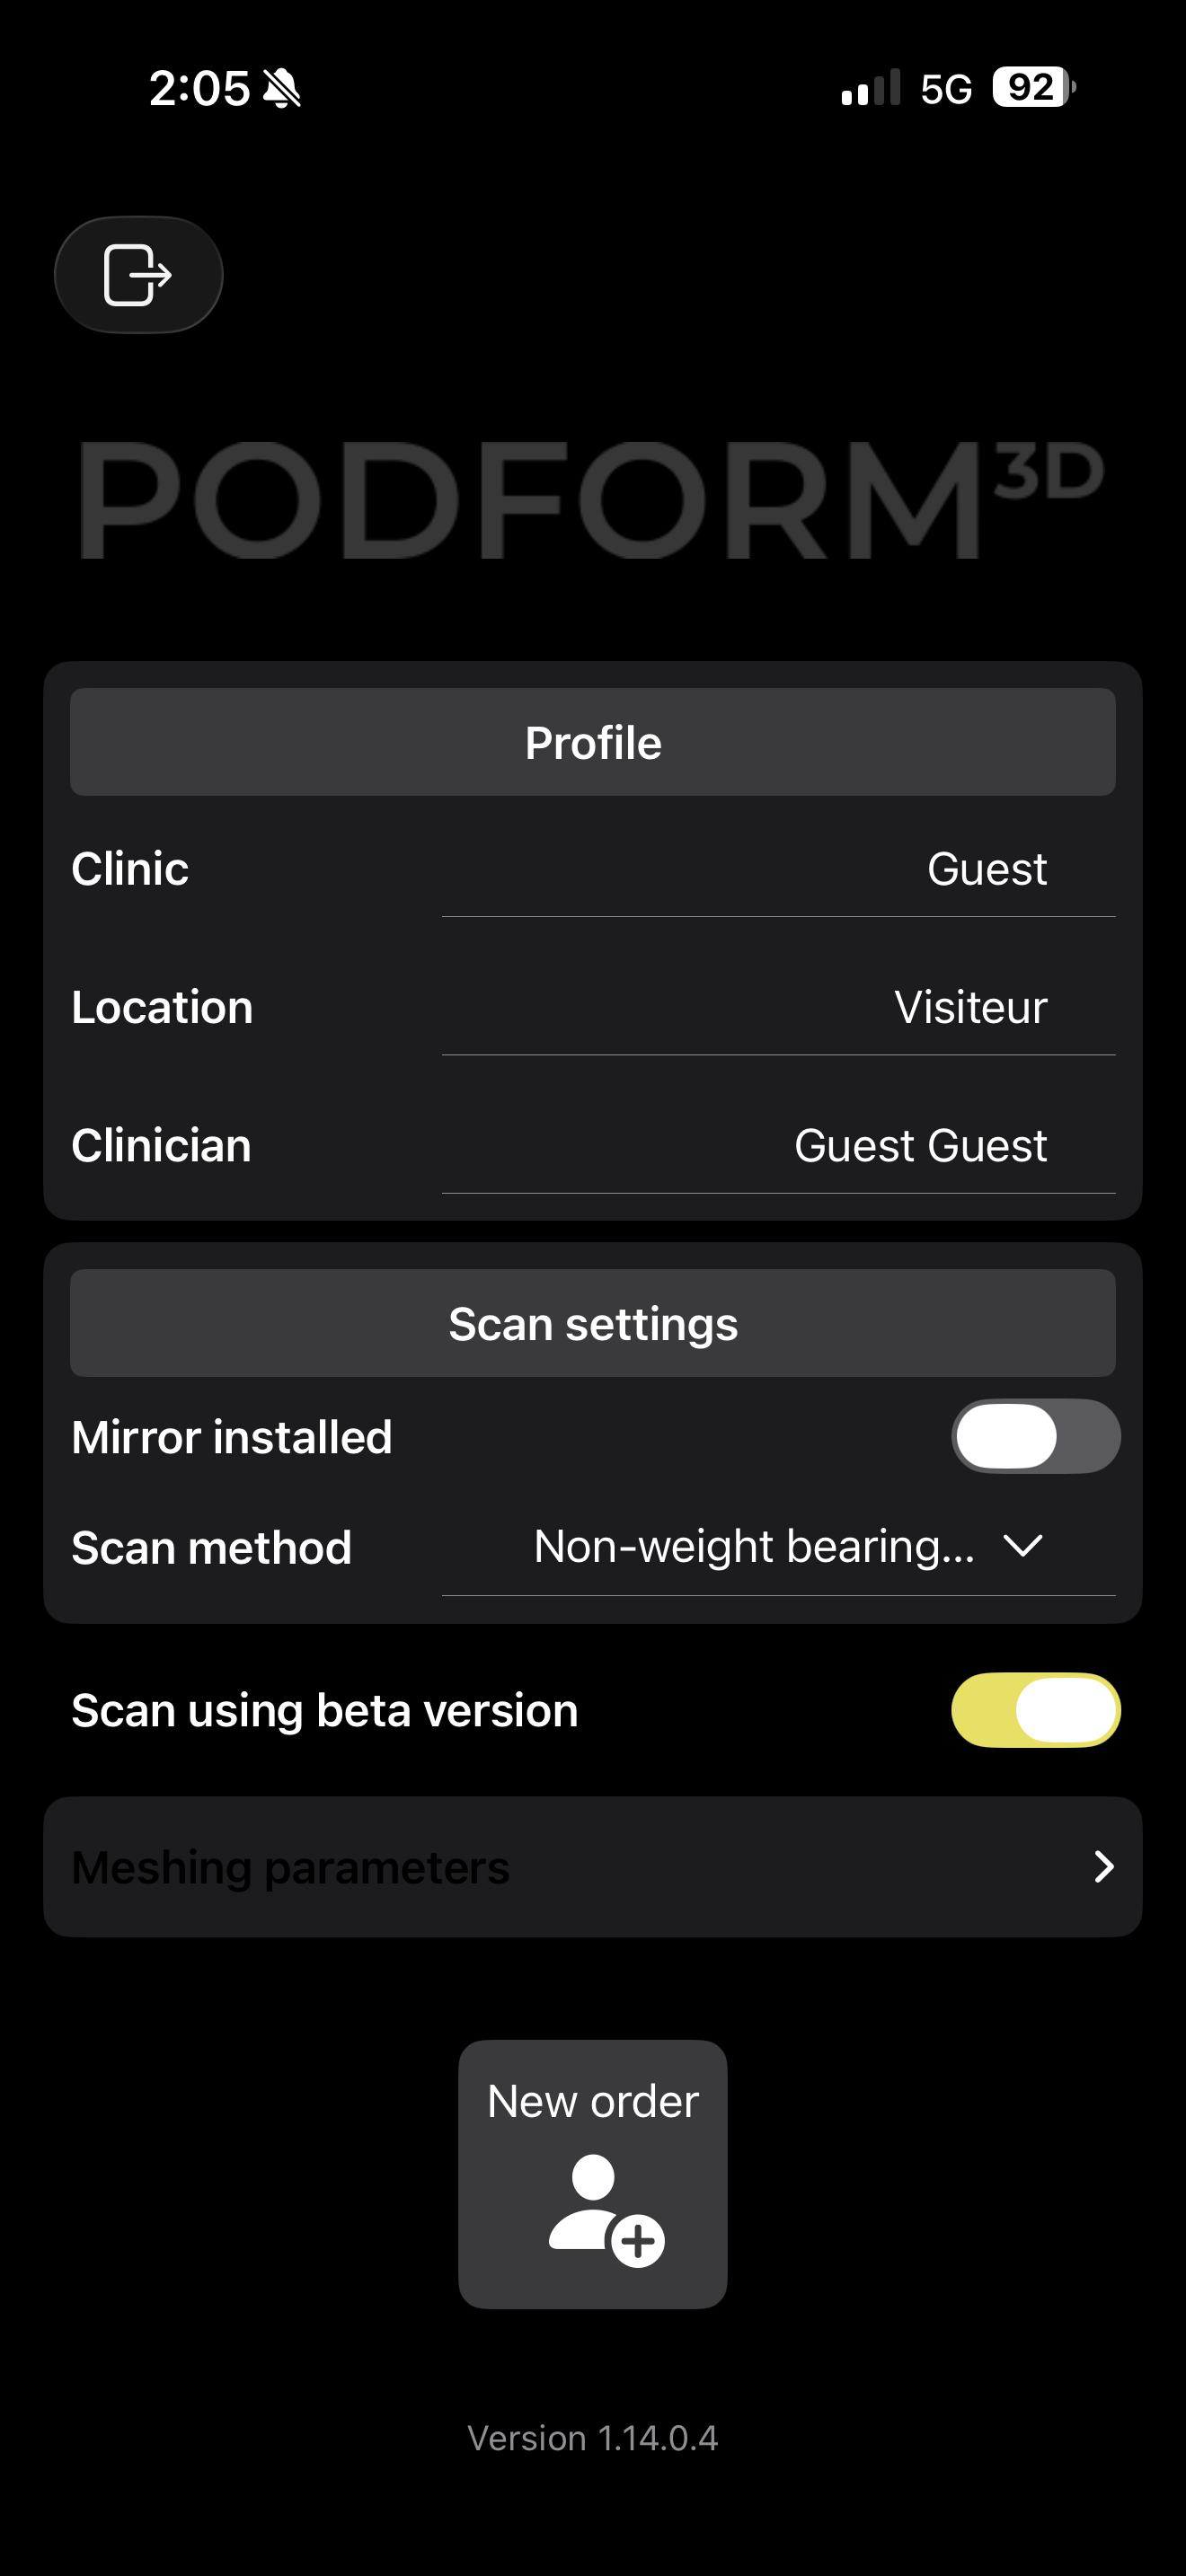
Use this screen to confirm account context and scan settings before creating a new order. Confirm Clinic, Location, and Clinician before scanning
Use the Clinic, Location, and Clinician dropdown data to confirm where the patient is being scanned. The app should show the correct clinic, the correct scanning location, and the clinician responsible for the scan before a new order is started.
Set Mirror installed correctly
Mirror installed is critical. If the iPhone, iPad, or mirror clip is being used with the mirror installed, toggle Mirror installed on. If the mirror is not being used, keep it off. Wrong mirror state changes the captured geometry and can create bad scan data.
Choose the correct scan method
Tap Scan method and choose the correct workflow. Use Semi-weight-bearing phone box when the scan is done with the phone box workflow. Use Non-weight-bearing direct scan when scanning the foot directly without weight bearing.
Start a new order and fill the required patient fields
Tap New order. First name and last name are mandatory. Patient ID is optional and can be used as an internal claim reference. Birthdate is optional and can be used as a patient reference.
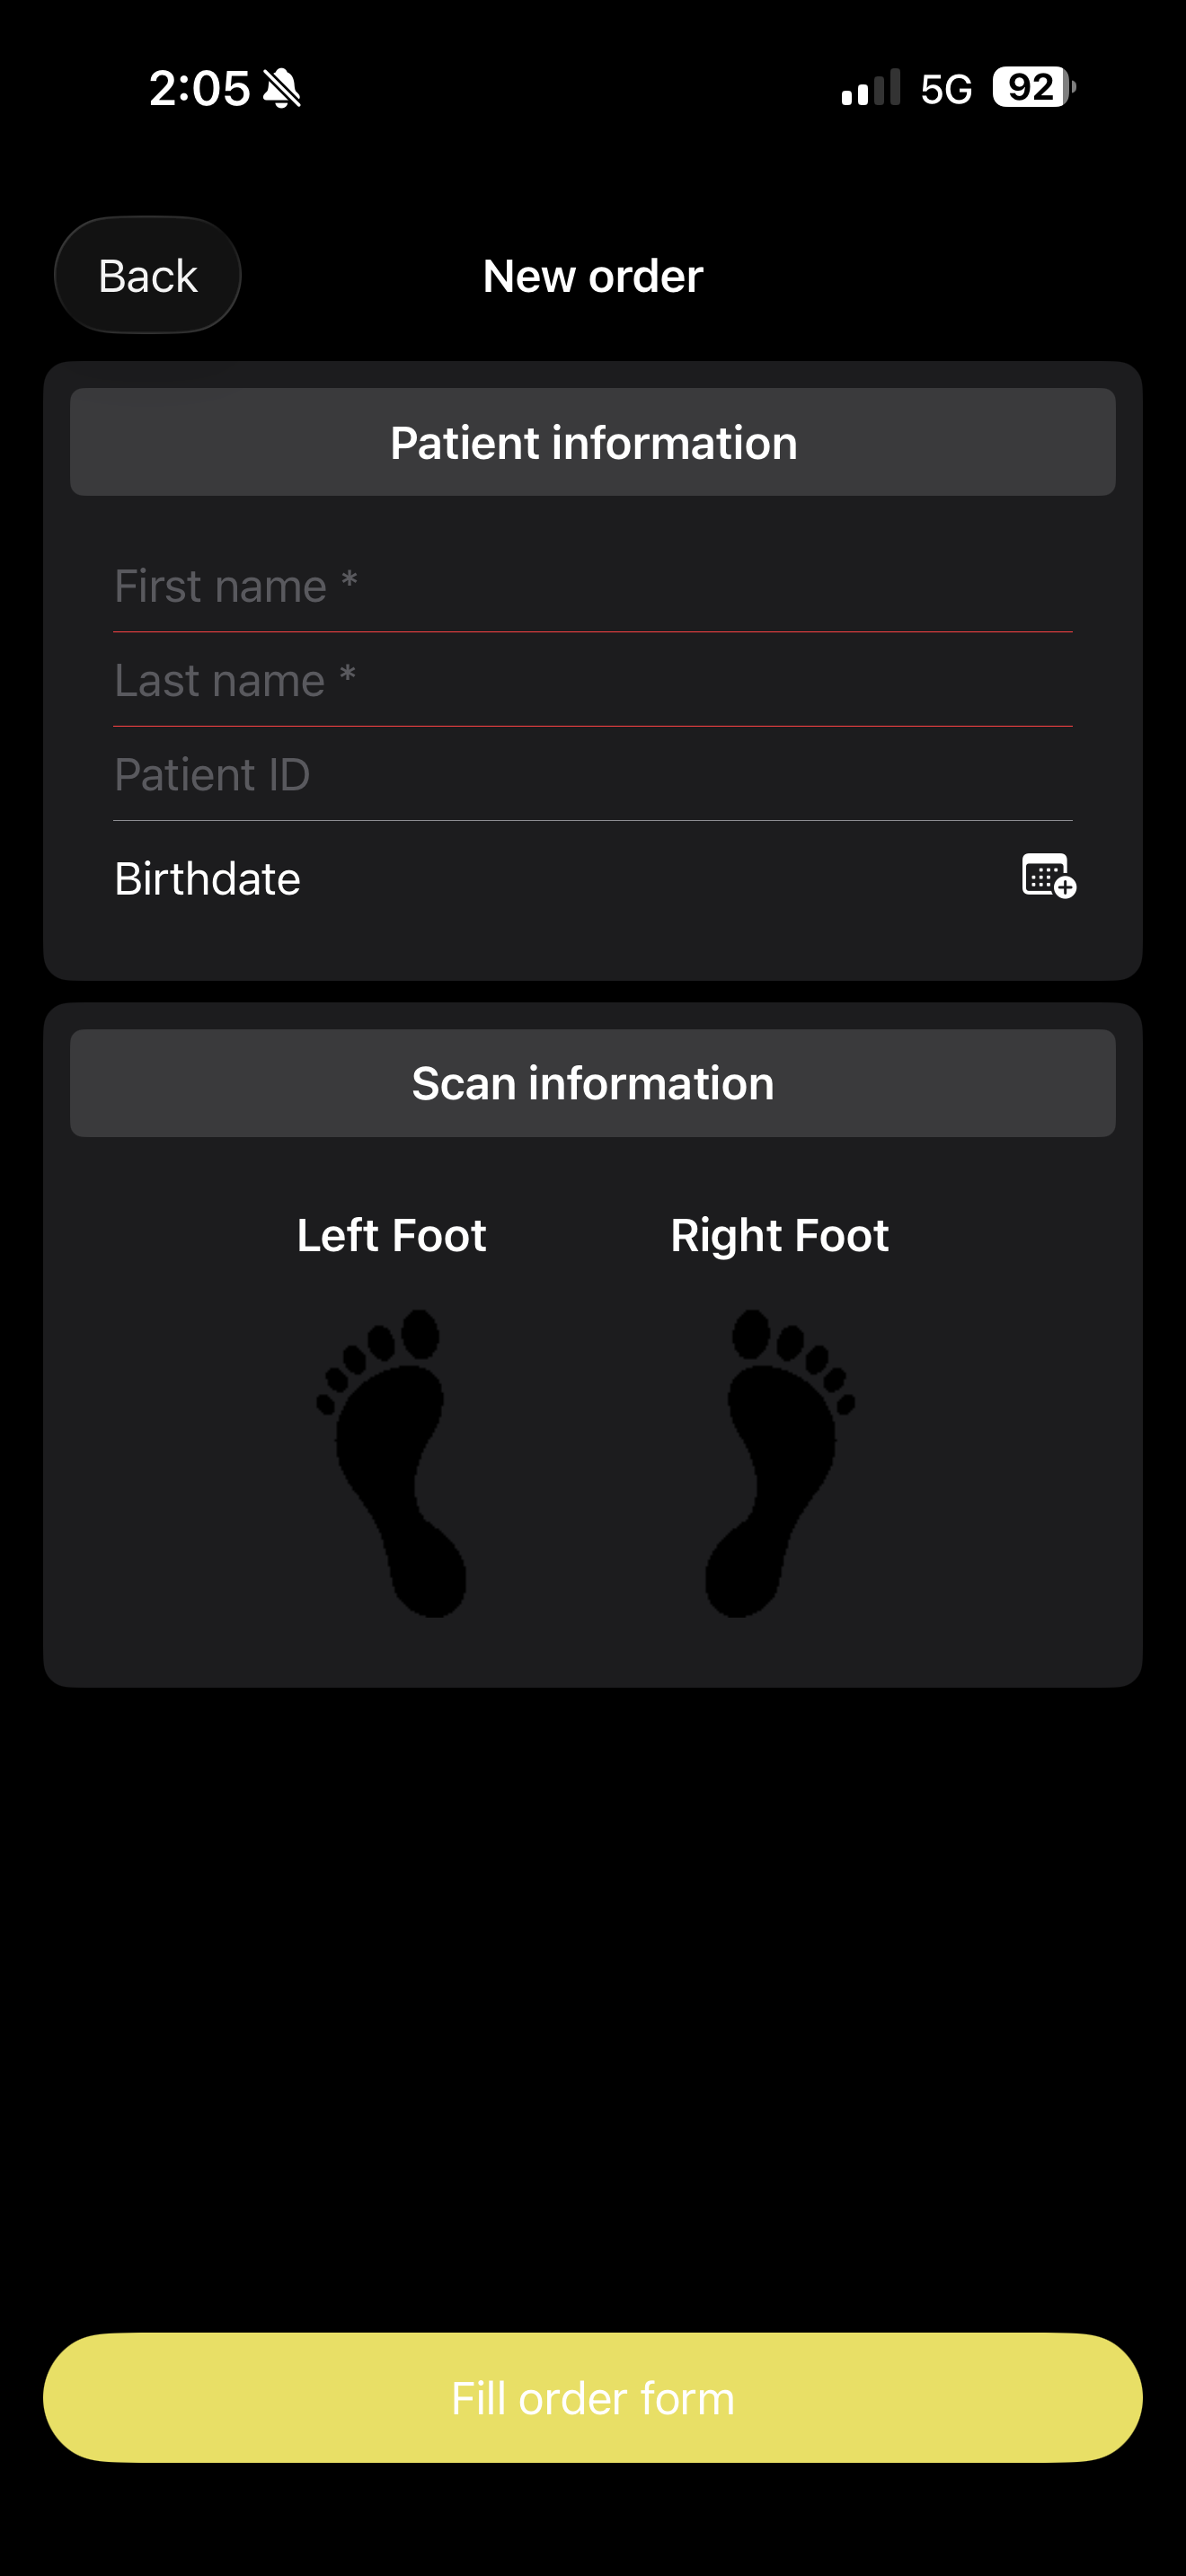
The red lines show the two mandatory patient fields. Patient ID and Birthdate are reference fields. Choose the scan side
In Scan information, choose whether the order needs the left foot, right foot, or both feet. Select only the side or sides that will be scanned.
Use the foot outline as distance feedback
The tutorial image is a foot outline. Move the camera closer to the foot until the app can start capturing. If the app says Move the camera closer to the foot, move closer before continuing.
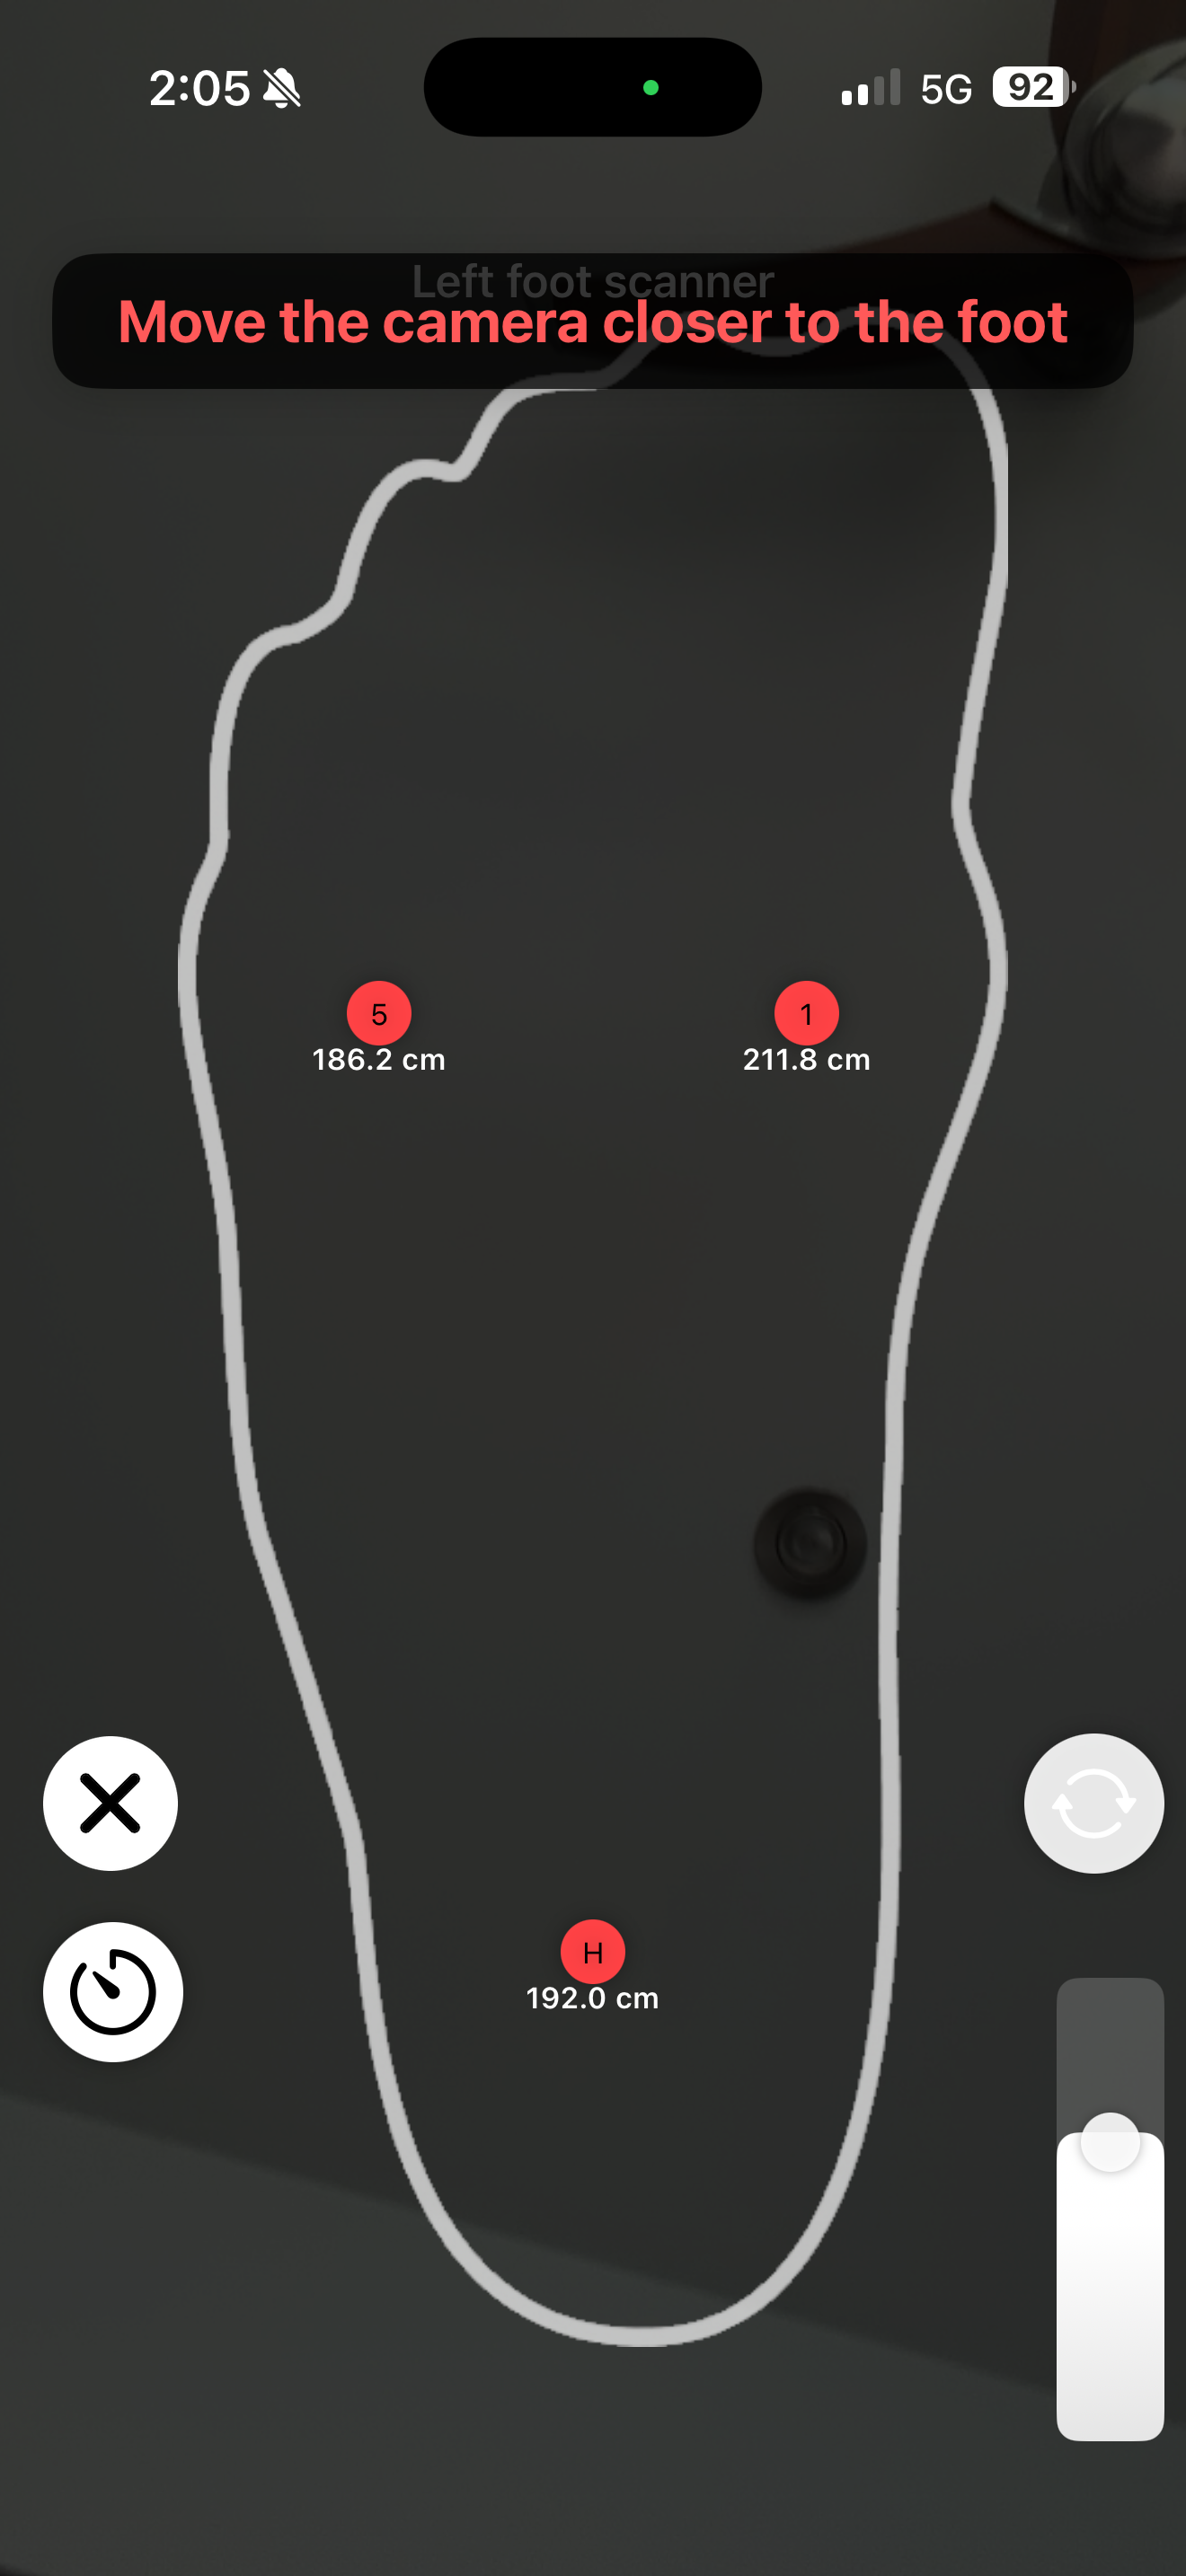
The outline and red message are live capture feedback. The scan is not ready until the foot is close enough.
Before you finish
- The app was downloaded from the App Store and opened.
- The operator stayed signed in and did not tap the top-left logout icon.
- Clinic, Location, and Clinician match the scan location.
- Mirror installed is on only if the mirror or mirror clip is being used.
- The scan method is set to Semi-weight-bearing phone box or Non-weight-bearing direct scan as appropriate.
- First name and last name are filled.
- The required scan side is selected.